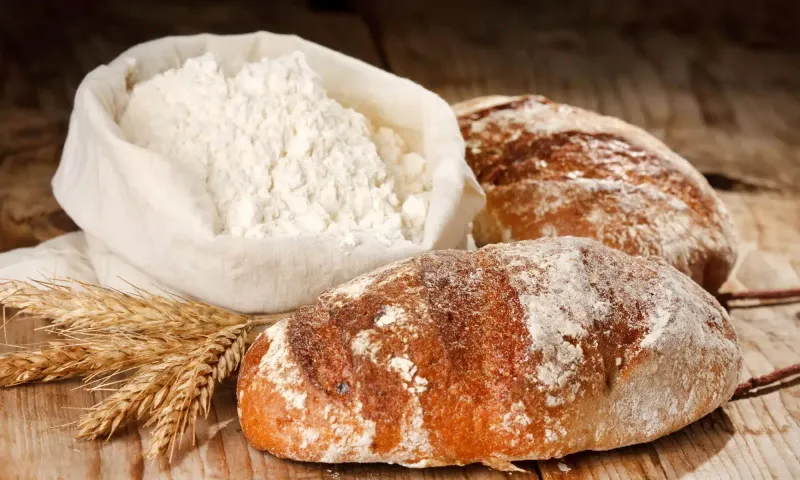
8 Bread-Baking Mistakes That Ruin Your Loaf And 9 Easy Steps That Lead to Bakery-Worthy Results
Baking bread at home can be incredibly satisfying… unless you end up with a dense, flat, or doughy disappointment. Even seasoned home bakers slip up sometimes, especially with finicky doughs or yeasty experiments. Let’s break it down: here are 8 common bread-baking mistakes that sabotage your loaf, plus 9 easy, smart steps that’ll have you turning out bakery-worthy bread in no time.
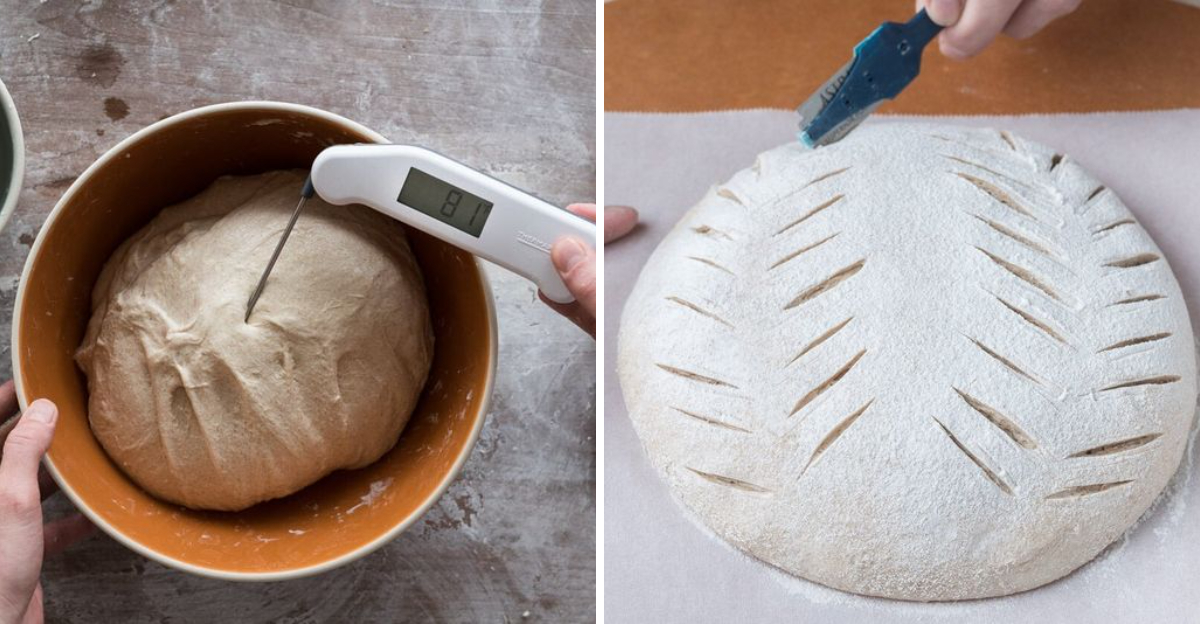
1. Using Water That’s Too Hot or Too Cold

Imagine the anticipation of tearing into a freshly baked loaf, only to discover a dense interior. The secret? Water temperature. Too hot, and you’re dealing with dead yeast; too cold, and your dough is sluggish. Aim for a warm touch, akin to a comforting bath, around 105–110°F.
This temperature range is crucial for activating yeast, ensuring your bread rises to its fluffy potential. A simple thermometer can be your best ally in this quest for the perfect loaf.
Precision here transforms a potential bread flop into a triumph worth the effort.
2. Not Letting the Dough Rise Enough (or Too Much)
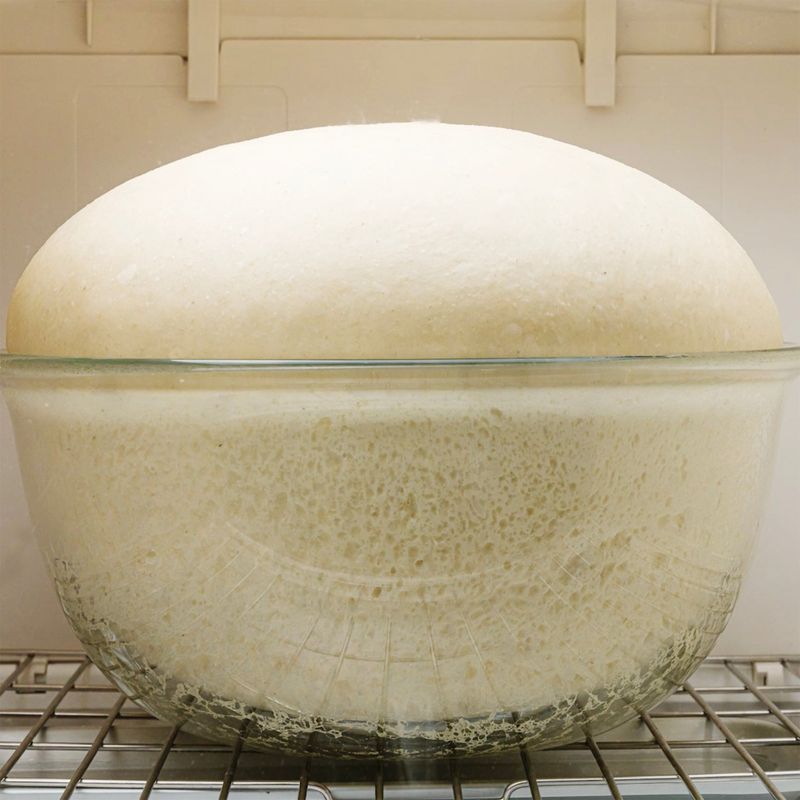
The rhythm of bread-making revolves around the rise. Under-proofing leads to a compact crumb, while over-proofing results in a deflated loaf. The dough should double in size, springing back gently when touched.
Patient observation is key, as the ambient temperature can hasten or hinder the process. A warm, draft-free spot is ideal for nurturing your dough.
This phase is a dance of time and texture, essential for developing depth and structure in your bread. Embrace the wait, and the reward is a loaf that sings with every slice.
3. Adding Too Much Flour
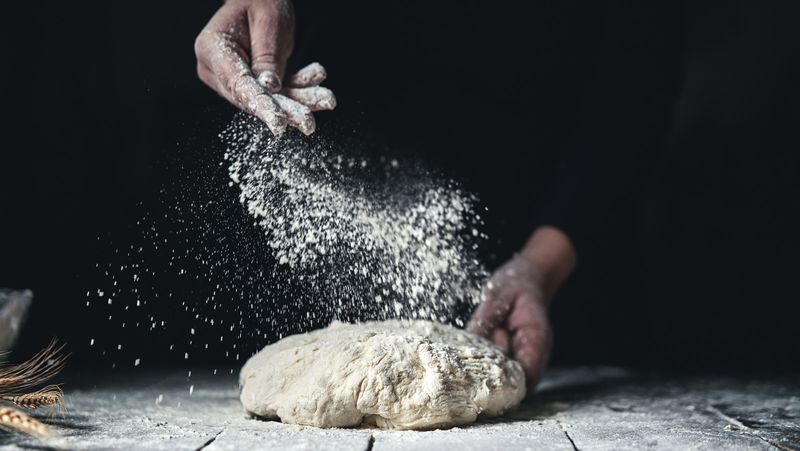
In the tactile world of bread-making, the temptation to over-flour is strong. However, restraint is key. Too much flour results in a dry, crumbly loaf that lacks the desired elasticity.
A slightly sticky dough is not a flaw but a feature, indicating the right hydration level. Embrace the stickiness, it’s a sign of a promising loaf.
Keep flouring minimal as you knead; a light dusting should suffice. Trust in the dough’s transformation, as it evolves under your hands into something extraordinary.
4. Skipping the Salt
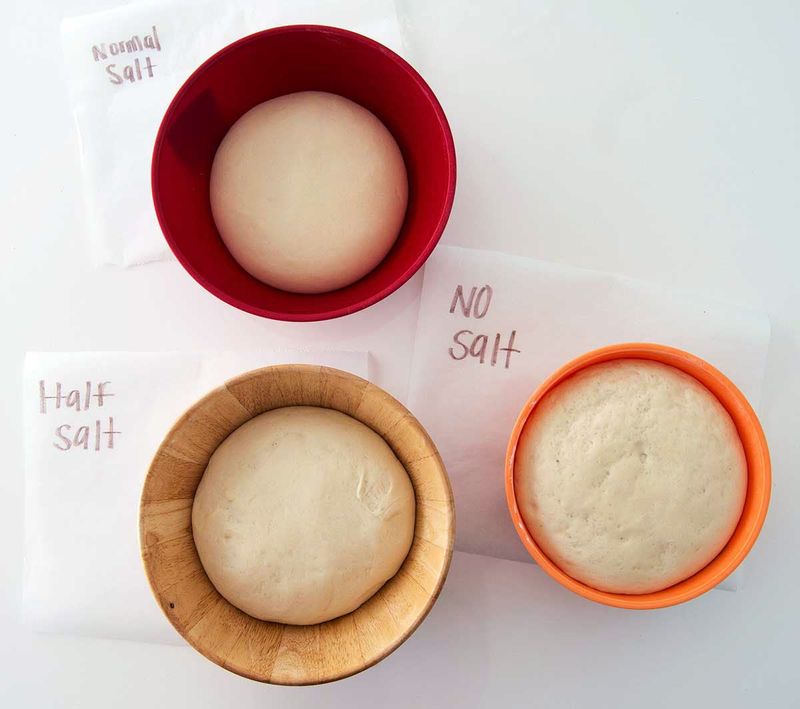
Salt in bread isn’t just for flavor; it plays a pivotal role in yeast regulation and gluten structure. Without salt, bread can taste flat and rise unpredictably.
Salt enhances the dough’s elasticity and contributes to its golden crust. This seemingly small ingredient is a linchpin in bread-making.
Remember, balance is everything. The right amount of salt harmonizes flavors and texture, elevating a simple loaf into something remarkable. Salt transforms the ordinary into the extraordinary, ensuring each bite is a delight.
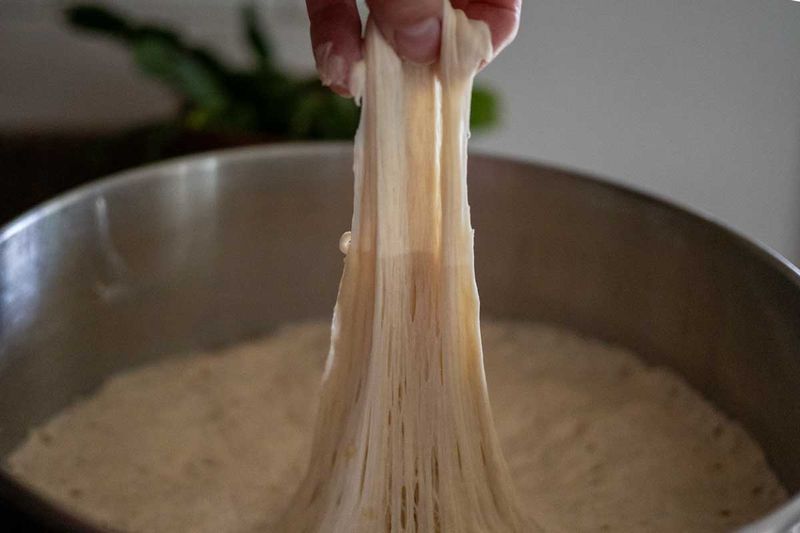
5. Overmixing or Undermixing the Dough
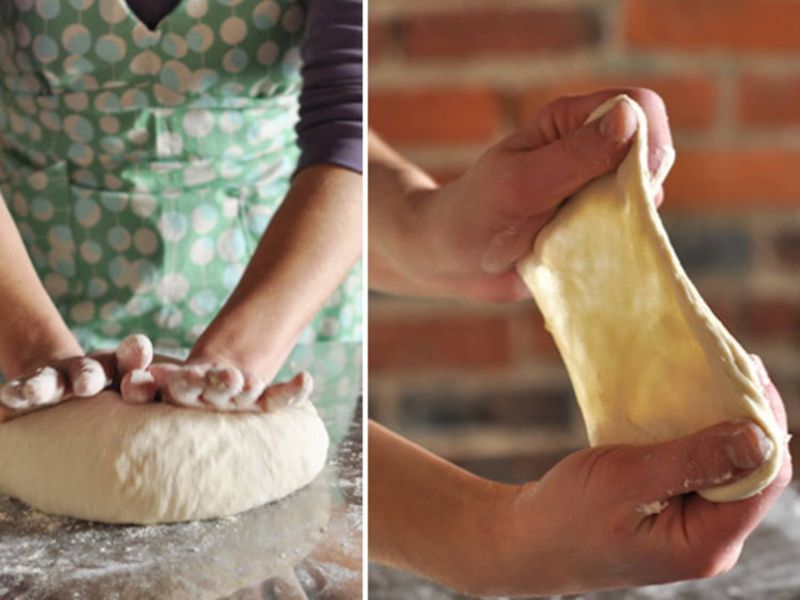
Bread-making requires intuition, especially in kneading. Overmixing can lead to a tough loaf, while undermixing results in weak structure. The goal is a smooth, elastic dough.
The ‘windowpane test’ is a handy technique: stretch a piece of dough until it’s thin and translucent. If it tears, keep kneading.
This balance is crucial; it’s where art meets science in baking. Achieving the perfect knead transforms humble ingredients into a harmonious loaf, showcasing the beauty of home-baked bread.
6. Cutting Into the Loaf Too Soon
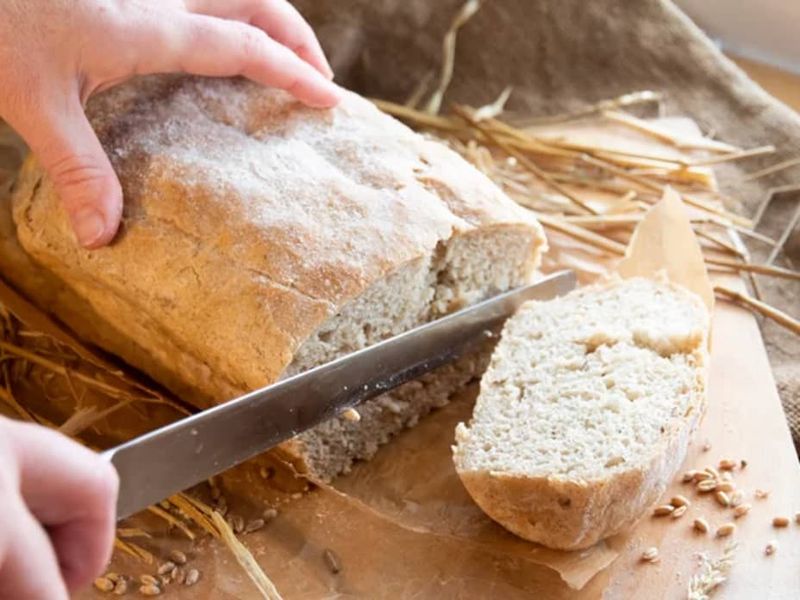
The aroma of fresh bread is irresistible, yet patience is vital. Slicing too soon disrupts the crumb, leaving a gummy texture.
Allow your loaf to rest for at least 30–60 minutes post-baking. This cooling period is essential for setting the structure.
It’s a lesson in delayed gratification, where waiting enhances the experience. Letting the bread cool yields a slice that’s as satisfying as the smell that first enticed you. Patience here turns anticipation into joy.
7. Not Scoring the Dough Before Baking
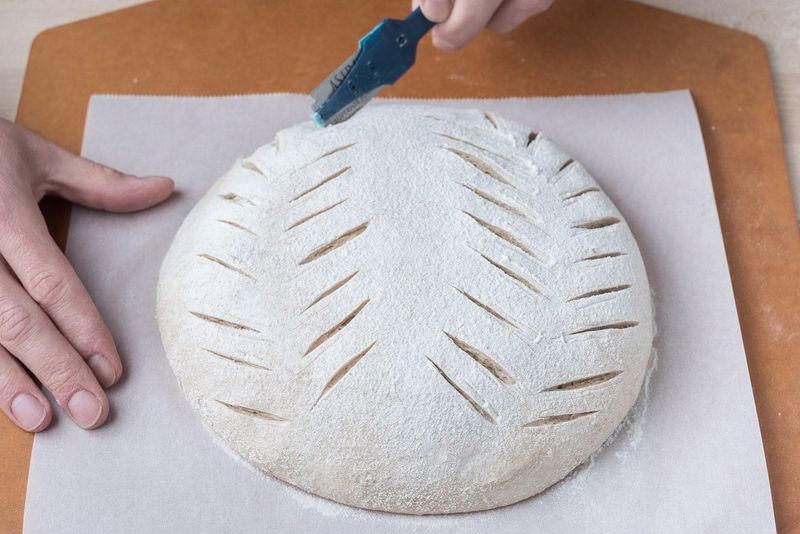
Scoring dough is more than aesthetics; it’s about directing the loaf’s expansion. Without these cuts, bread may burst unpredictably during baking.
A sharp blade or lame creates beautiful patterns and controls the dough’s rise. It’s both a practical step and an artistic flourish.
This technique allows the baker to guide the bread’s final form. Embrace this ritual, and watch as your loaf transforms into a masterpiece, both visually and structurally.
8. Inconsistent Oven Temperature
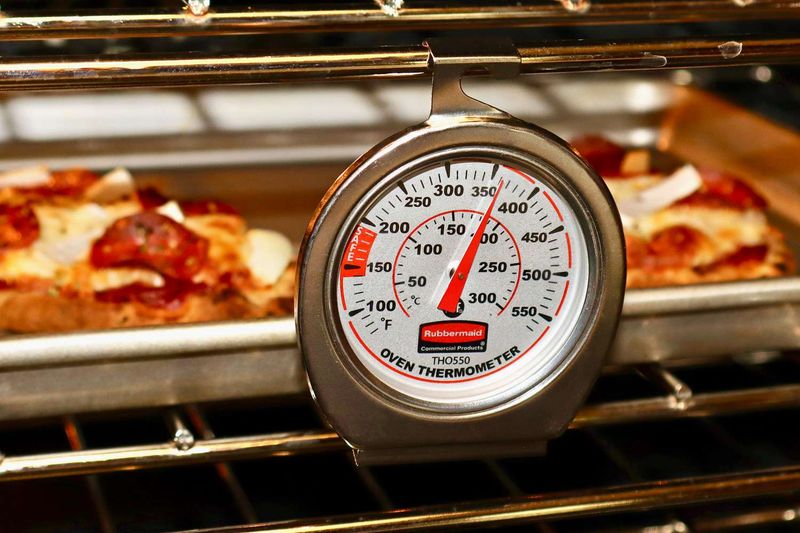
Even an oven can deceive, claiming a temperature that doesn’t match reality. Inconsistent heat can spell disaster for bread, especially in artisan loaves.
An oven thermometer is a trustworthy companion, ensuring the heat is just right. This small tool adjusts your baking to perfection, offering consistent results.
Accurate temperature transforms your kitchen into a bakery, where each loaf reaches its full potential. Precision here is the gateway to bread that’s golden and evenly baked.
9. Use Bread Flour (When Called For)
Flour choice affects bread’s texture and rise. Bread flour, with its higher protein, lends strength and chew, ideal for crusty loaves.
Using the right flour enhances gluten development, creating a structured, chewy crumb. It’s the difference between a soft slice and a hearty bite.
For those aiming for bakery-quality results, bread flour is a worthy investment. This simple switch can elevate your baking from ordinary to exceptional, ensuring each loaf stands out.
10. Master the Windowpane Test
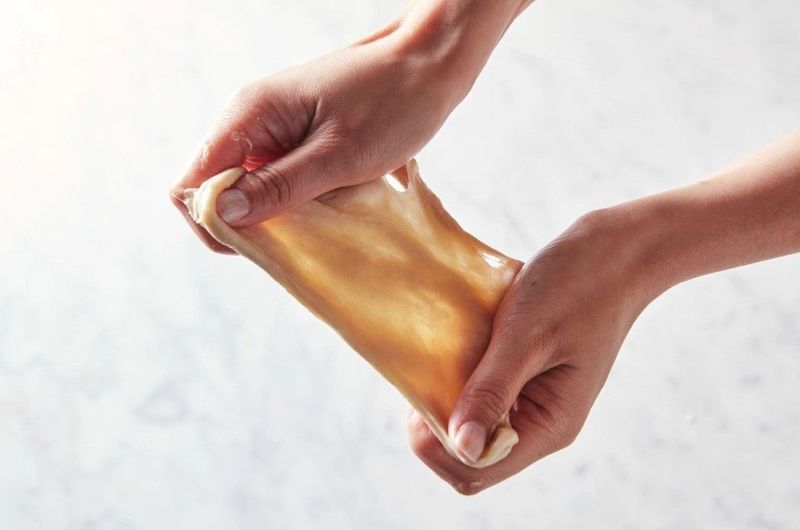
The windowpane test is a baker’s secret for perfect dough. Stretch a small piece, and if it forms a thin, see-through window, the gluten is well-developed.
This test prevents under or over-kneading, ensuring your dough is ready for proofing. It’s a tactile step that connects the baker to the bread.
Mastering this test is a step towards consistent success, where intuition meets technique. It’s a small task with a big payoff, ensuring the dough’s readiness for baking glory.
11. Create a Warm, Draft-Free Rise Spot

Dough thrives in warmth, away from drafts. A consistent environment ensures an even rise, crucial for quality bread.
An off oven with the light on or near a warm window works wonders. This nurturing spot allows yeast to flourish, making the dough light and airy.
Establishing the perfect rise area is an investment in your bread’s future. It’s where magic happens, as humble ingredients transform into a loaf full of life and flavor.
12. Use a Kitchen Scale, Not Just Measuring Cups
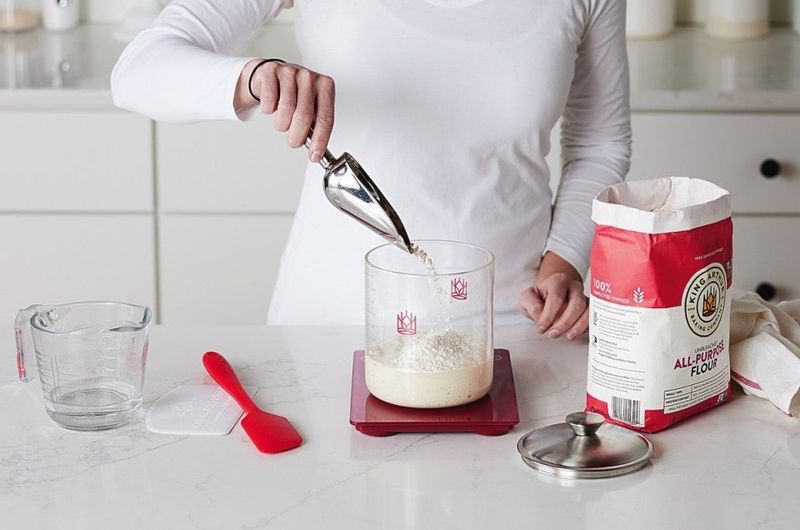
Precision is the hallmark of excellent bread baking. A kitchen scale brings accuracy to your measurements, ensuring the perfect balance of ingredients.
Unlike measuring cups, a scale accounts for flour’s variable density, pivotal for hydration and texture. Precise measurements lead to consistent results.
Investing in a scale elevates your baking, aligning it with professional standards. It’s a small change with significant impact, translating meticulous care into bread that reflects your dedication.
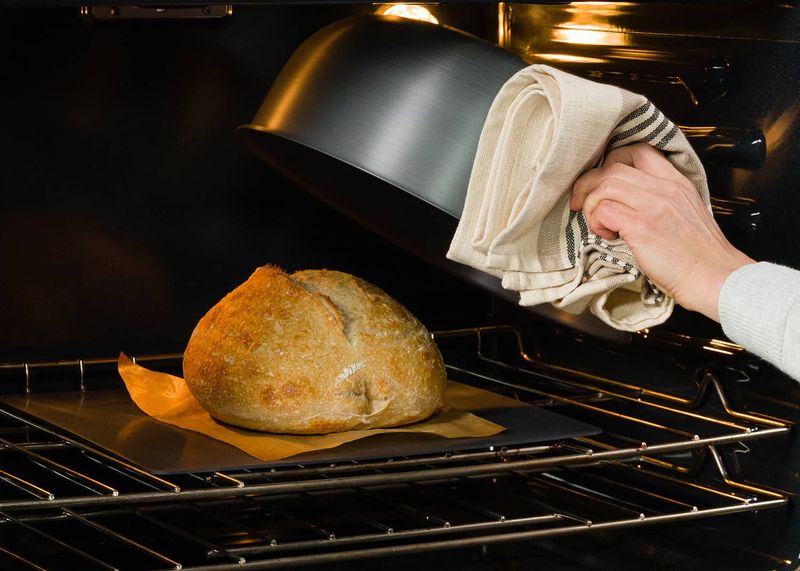
13. Steam the Oven (For Crusty Bread)
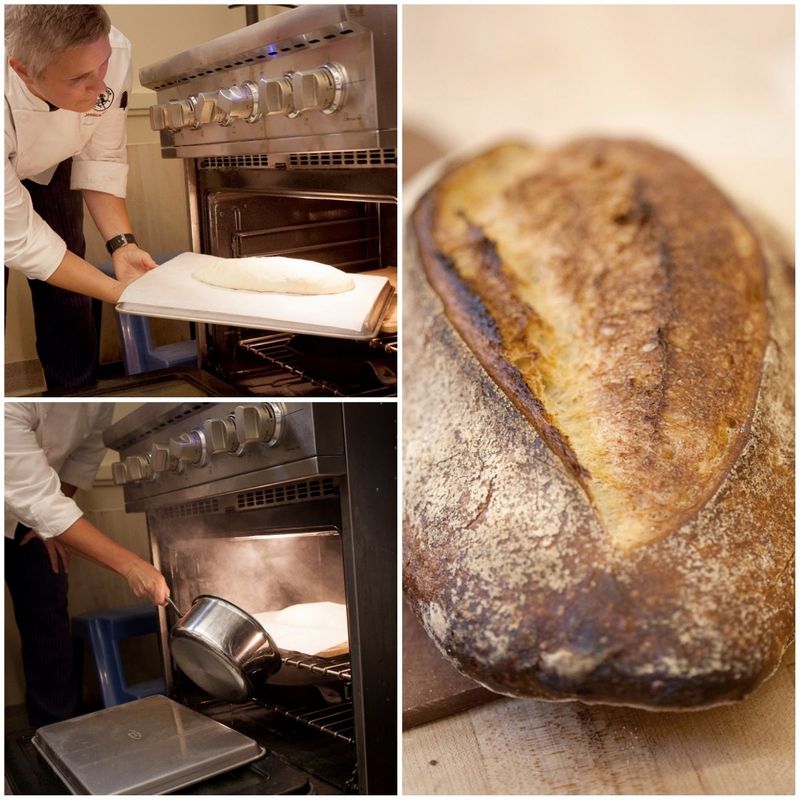
Steam is the secret to a crusty, golden bread exterior. It keeps the dough’s surface moist, allowing it to expand fully before setting.
Introducing steam can be as simple as adding a tray of water or spraying water into the oven. This creates a bakery-like crust.
Mastering steam transforms homemade bread into artisanal creations, elevating texture and appearance. This step bridges home baking with professional techniques, crafting crusts that crackle delightfully.
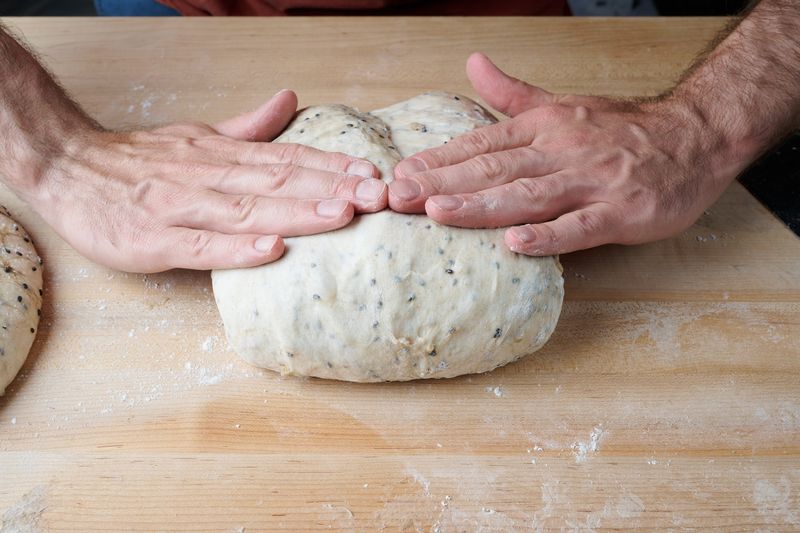
14. Rest the Dough Between Steps
Resting dough, or bench resting, is a pause that enhances elasticity and workability. This break before shaping is crucial for oven spring.
During rest, gluten relaxes, making the dough easier to handle. It’s a moment for the dough to gather strength for the final rise.
This strategic pause is about patience and respect for the process, ensuring the bread’s texture is optimal. It’s a subtle step with a profound impact on the final loaf’s quality.
15. Preheat the Oven—And Your Baking Vessel
Preheating is essential for an impressive rise and crust. A hot oven jumpstarts the bread’s expansion, while a preheated vessel contains the heat.
This step is non-negotiable for achieving that characteristic oven spring. It sets the stage for bread that’s light yet structured.
Preheating isn’t just about temperature; it’s about readiness, preparing the bread for a grand transformation. This anticipation is key to bakery-worthy loaves, setting them apart in both texture and appearance.
16. Use Parchment Paper to Transfer Dough
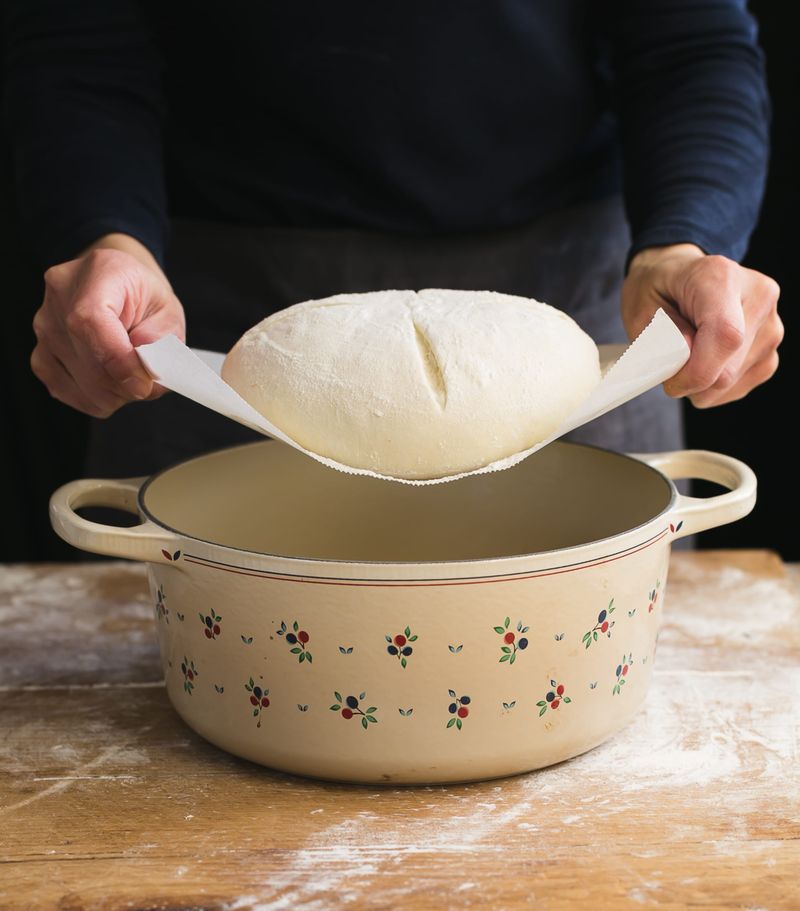
Parchment paper simplifies dough transfer, especially for sticky or no-knead varieties. It prevents deflation and mess.
This tool ensures a smooth transition into the baking vessel, maintaining the dough’s shape and rise. It’s practical and effective.
Embracing parchment paper is about embracing ease and precision, ensuring your hard work culminates in a beautifully baked loaf. It’s a small detail that makes a big difference in the final presentation.
17. Practice Patience—Bread Gets Better With Repetition
Bread baking is a journey, where each loaf teaches valuable lessons. Repetition refines skills, making instinctive what was once perplexing.
With each bake, timing and hydration become clearer, leading to improved outcomes. It’s about embracing the process and learning from each attempt.
Patience and practice turn bread-making into an art form, where dedication to improvement results in bread that’s consistently delightful. This journey is a testament to growth and the rewarding nature of persistence.