6 Sourdough Tips That Confuse Beginners and 5 That Take You From Start to Finish
Sourdough baking can be an artful journey filled with intrigue and confusion. For beginners, navigating through various tips can be overwhelming. This guide aims to clarify those mystifying tips and offer practical advice to enhance your baking journey. From understanding the right cues for feeding your starter to mastering the art of the perfect crust, these insights will empower you to bake like a pro. Whether you’re just starting out or looking to refine your skills, these tips cover the spectrum of sourdough baking.
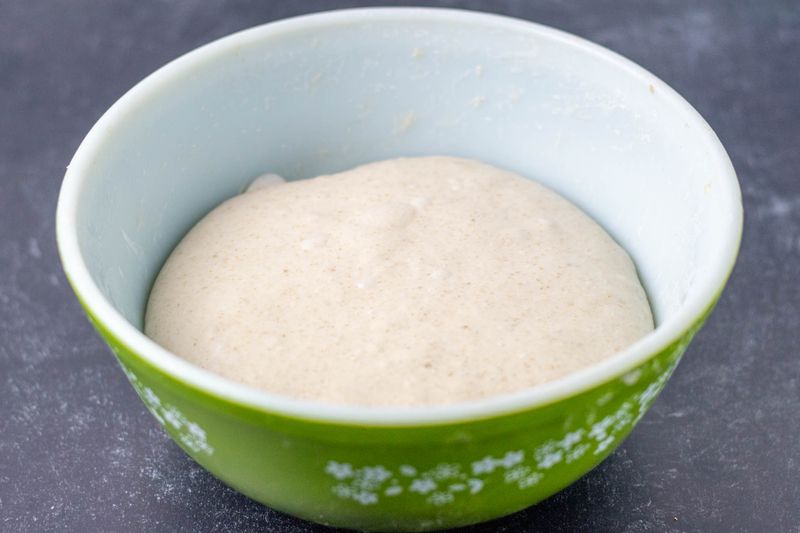
1. Feed Your Starter When It Doubles in Size

The notion of feeding your starter when it doubles in size seems straightforward, but what if it triples or doesn’t rise at all? A more reliable cue is observing a bubbly, slightly domed top and a tangy aroma. These indicators suggest that your starter is thriving and ready for its next feeding.
It’s essential to familiarize yourself with the nuances of your starter’s growth. Each starter is unique, and understanding its rhythm can make or break your sourdough adventure. Trust your senses over rigid rules.
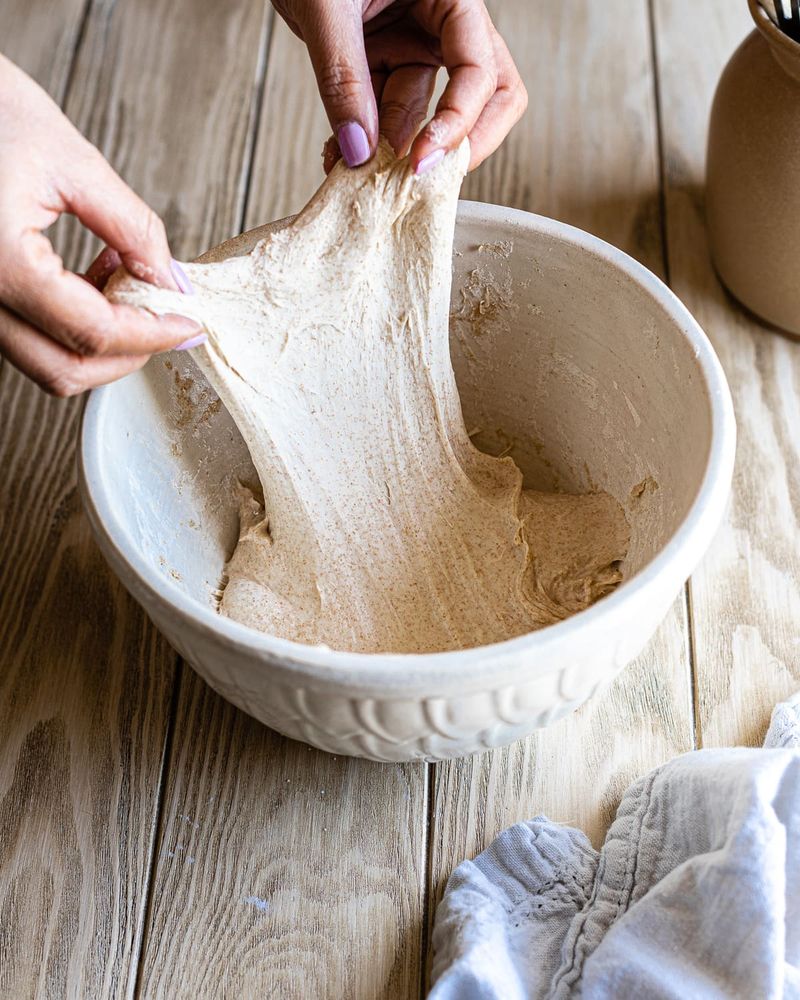
2. Stretch and Fold Every 30 Minutes
The advice to stretch and fold every 30 minutes can leave beginners scratching their heads. How long should this continue? Generally, 3–4 rounds within a few hours are sufficient to develop gluten structure.
Rather than adhering to a strict schedule, pay attention to the dough’s texture and elasticity. Each stretch and fold session transforms the dough, enhancing its strength and flexibility. This technique, though initially perplexing, becomes intuitive with practice.
3. Autolyse Before Mixing
The term ‘autolyse’ might intimidate new bakers, but it merely involves letting flour and water rest before adding other ingredients. This step can improve dough hydration and gluten development.
While it sounds complex, beginners can skip it initially without compromising their bread’s quality. Once confident, incorporating an autolyse can elevate your sourdough’s texture. Embrace this technique as you grow more comfortable with the baking process.
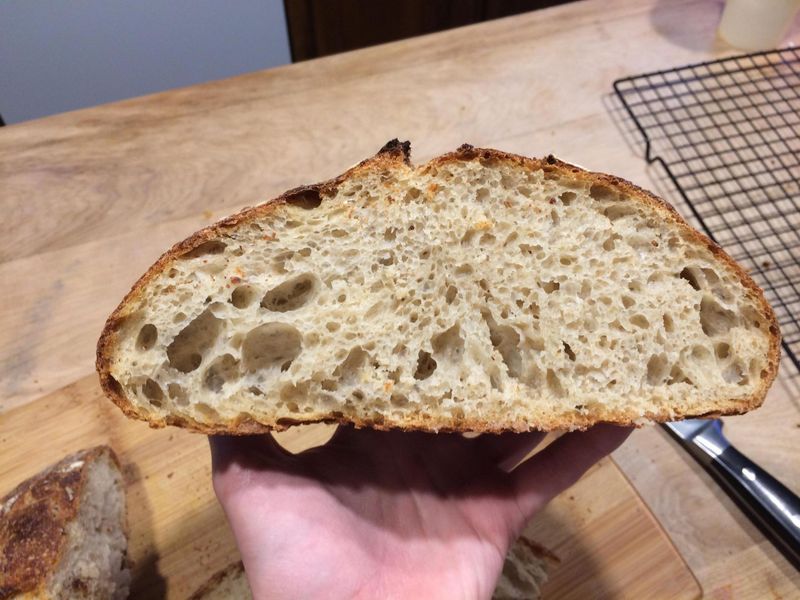
4. Bake in a Dutch Oven for Steam
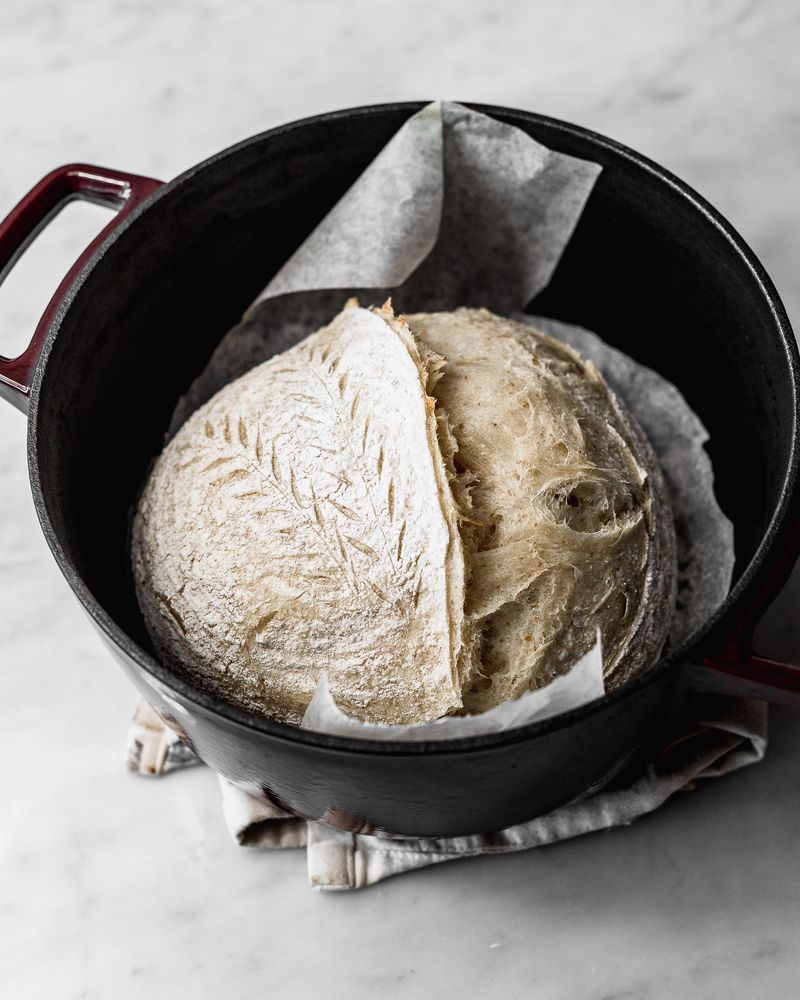
The instruction to bake in a Dutch oven for steam can leave many questions. Do you preheat the pot? Should the dough go in cold? The answer is straightforward: yes, preheat the pot and use the lid to trap steam.
This method encourages a robust rise and a crispy crust. Though seemingly complex, mastering this technique can transform your homemade sourdough into a bakery-quality loaf.
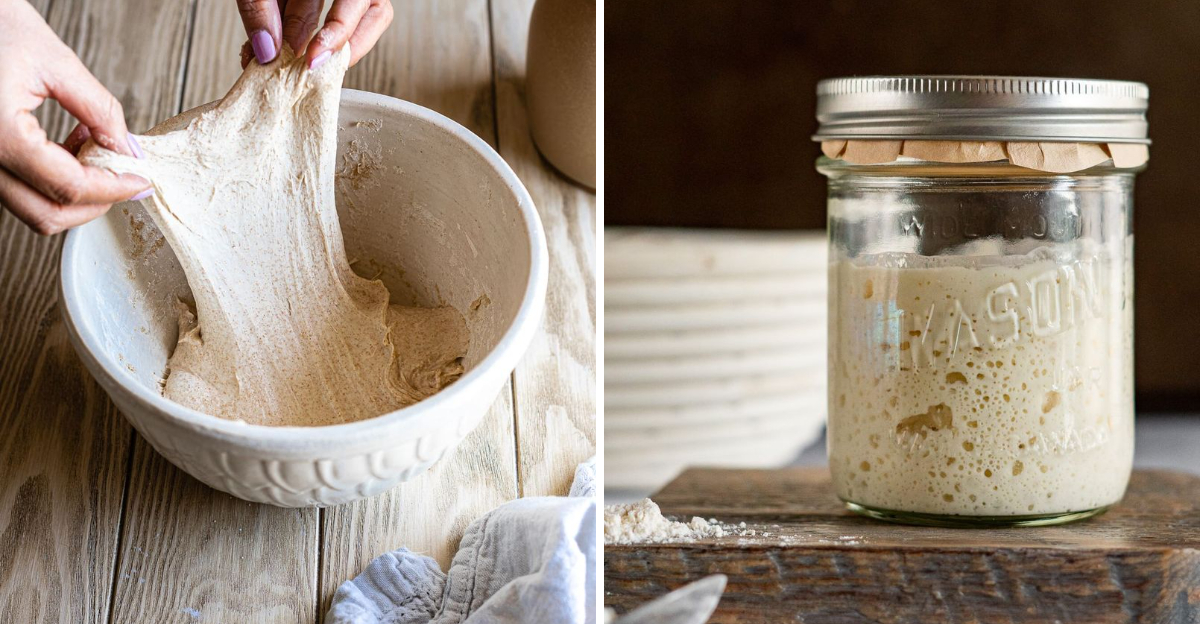
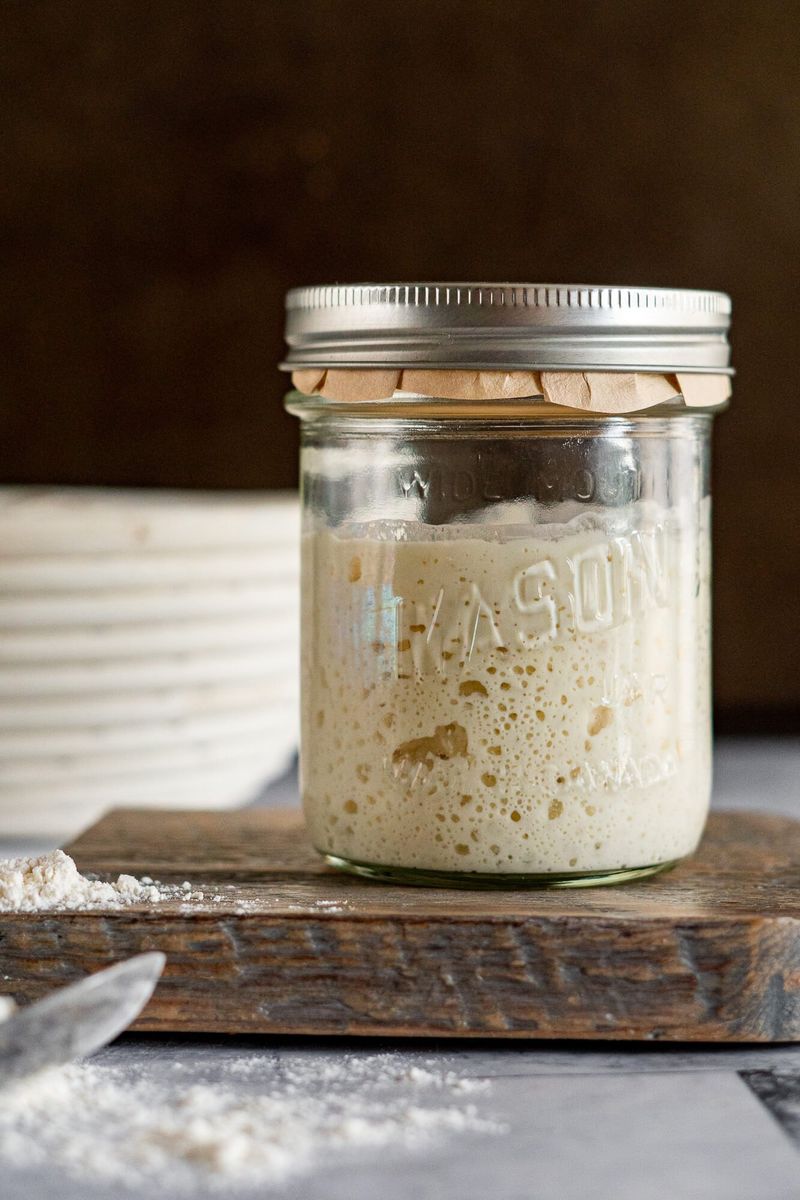
5. Use the ‘Float Test’ to See if Your Starter is Ready

The float test, often recommended to check a starter’s readiness, can be misleading. A bubbly, active starter may not always float but could still be ready to use.
Trust in visual cues like rise, activity, and smell over this test. While the float test offers a quick assessment, it’s not foolproof. Develop a keen eye for your starter’s subtleties to bake with confidence.
6. Bulk Fermentation Should Take 4–6 Hours
The guideline that bulk fermentation should take 4–6 hours is contingent on conditions like room temperature and starter vitality. Instead of watching the clock, monitor dough volume and texture.
A well-fermented dough will appear airy and slightly puffed. This phase is crucial for flavor and structure development. Adapting to your environment’s variables will enhance your sourdough’s success.
7. Name and Feed Your Starter Consistently
Naming and feeding your starter consistently fosters a relationship with your dough. Providing equal parts flour and water daily, and discarding when necessary, ensures a robust culture.
Consistency in care breeds reliable results. As your starter flourishes, so will your bread-making skills. This simple routine becomes a rewarding part of the sourdough experience.
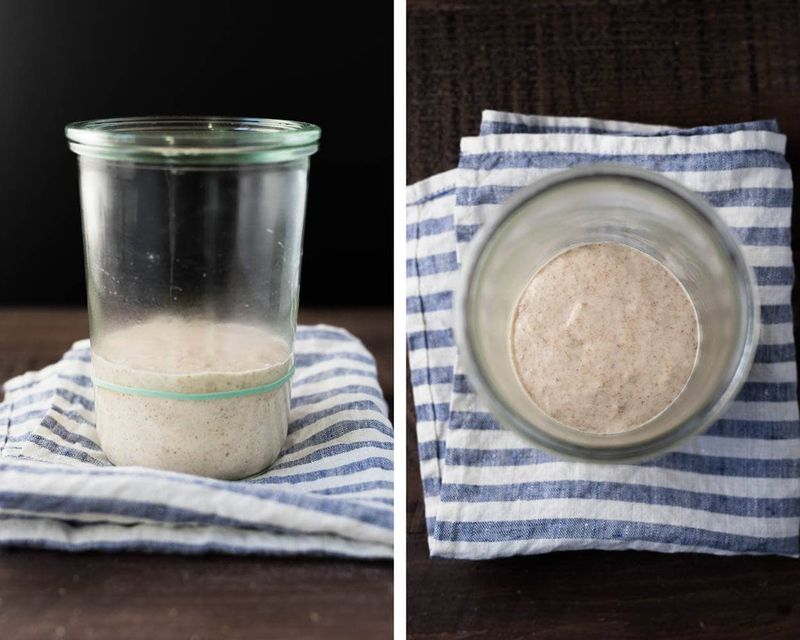
8. Use a Clear Container to Track Rise
A clear container allows you to visually track your starter’s rise, eliminating guesswork. Marking the level after feeding and observing its progress provides tangible feedback.
This clarity helps you understand your starter’s behavior, aiding in timing your baking endeavors. A transparent vessel becomes an invaluable tool in your sourdough toolkit.
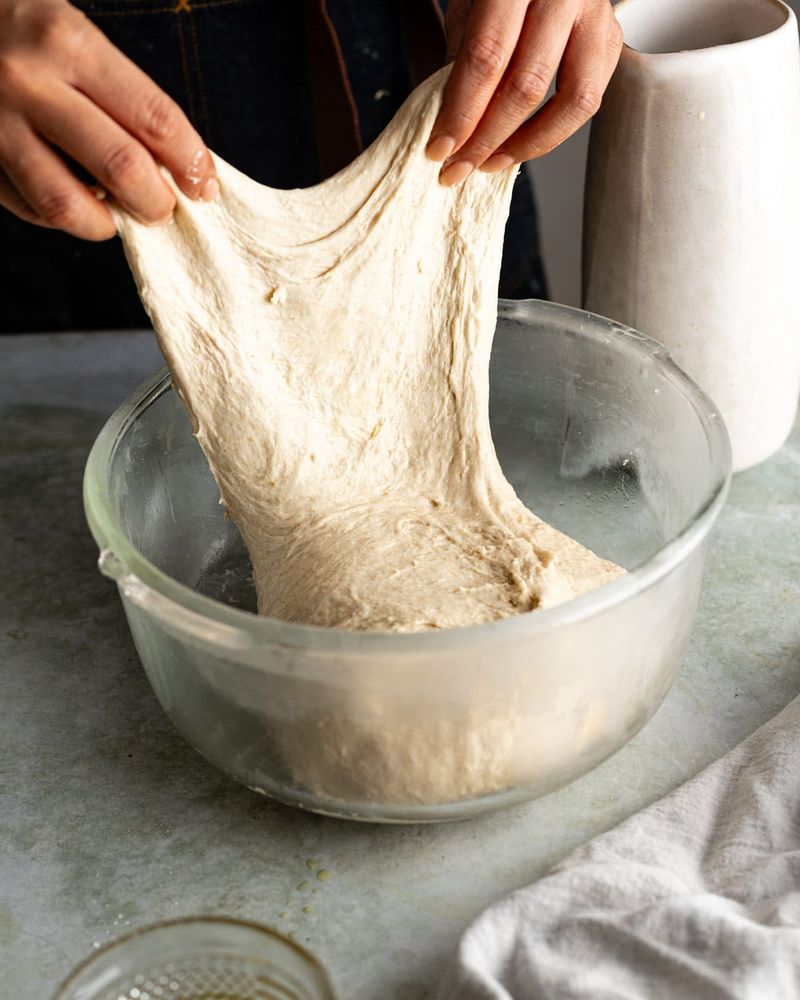
9. Learn the ‘Windowpane Test’

The windowpane test is a simple check for gluten readiness. By gently stretching a small piece of dough, you can gauge its elasticity and strength. If it forms a thin, see-through sheet without tearing, the dough is ready.
This test gives immediate feedback on kneading progress. Easy to master, it becomes a vital step in assessing dough quality.
10. Let the Dough Rest in the Fridge Overnight
Allowing dough to rest in the fridge overnight slows fermentation and enhances flavor. This method provides schedule flexibility, preventing late-night bakes and promoting a richer taste.
Cold fermentation is a game-changer for busy bakers. Its convenience and impact on flavor make it a beloved technique in the sourdough community.
11. Bake on Parchment Paper, Then Slide into a Hot Pot
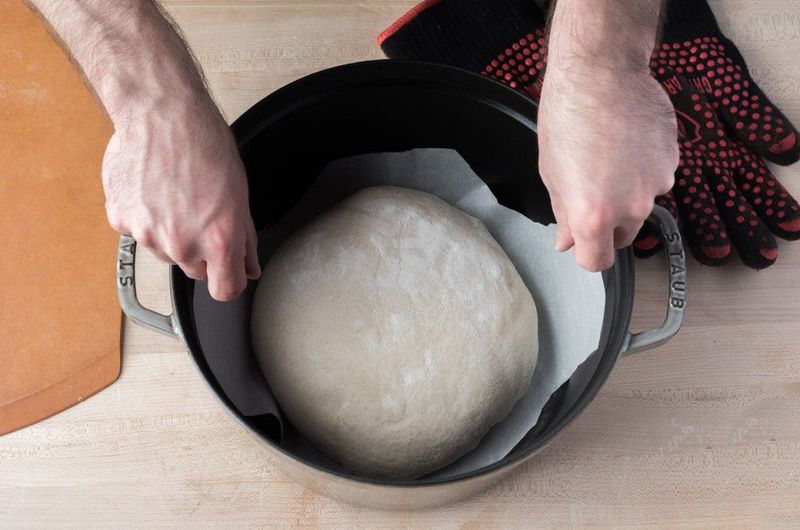
Baking on parchment paper simplifies the transfer into a hot pot, minimizing mishaps. This technique ensures a smooth process from shaping to baking.
The parchment paper acts as a cradle, supporting the dough and easing handling. It’s a small step that makes a significant difference in your baking journey.